From Antiflux Wiki
(→Apple Mail) |
(→Apple's Mail.app) |
||
| Line 21: | Line 21: | ||
== Apple's Mail.app == | == Apple's Mail.app == | ||
| - | Apple's [http://www.apple.com/ | + | Apple's [http://www.apple.com/osx/apps/#mail Mail.app] is easy to configure for Antiflux email. Start the program and go to Mail -> Preferences -> Accounts. Click the "+" button to add a new account. |
Fill in your name, email address, and password. | Fill in your name, email address, and password. | ||
Revision as of 00:55, 1 February 2014
You have 3 options for checking your Antiflux email.
- webmail
- An IMAP client like Thunderbird, Mail.app, or even Outlook.
- Log in to with ssh and use mutt or pine
There are also more esoteric ways like using Fetchmail with SSL to get your email.
IMAP client instructions
First, you'll probably have to install the Antiflux root CA so your mail program recognizes our SSL certificate. It's required to communicate securely with the Antiflux mail server.
Next, these are the important settings.
- server type: IMAP
- incoming mail server: mail.antiflux.org
- use SSL encryption
- incoming mail server port: 993 (should be the default)
- authentication: password
- IMAP path prefix: (none)
- outgoing mail server: mail.antiflux.org (or your ISP's mail server if you prefer)
Apple's Mail.app
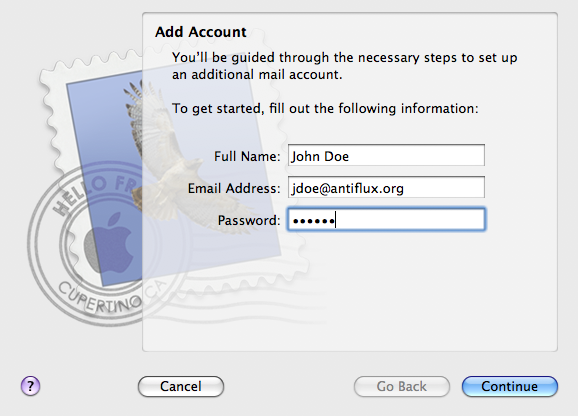
Apple's Mail.app is easy to configure for Antiflux email. Start the program and go to Mail -> Preferences -> Accounts. Click the "+" button to add a new account.
Fill in your name, email address, and password.
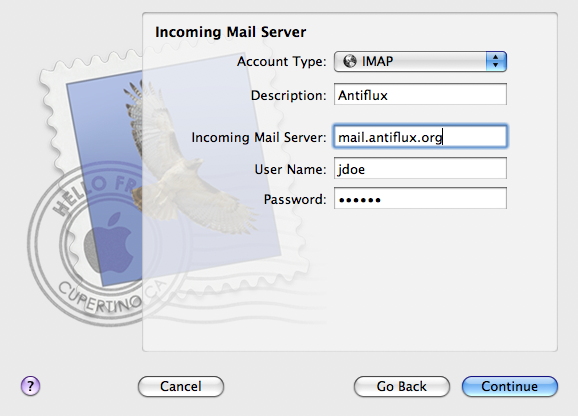
Set the account type to IMAP and the incoming mail server to mail.antiflux.org.
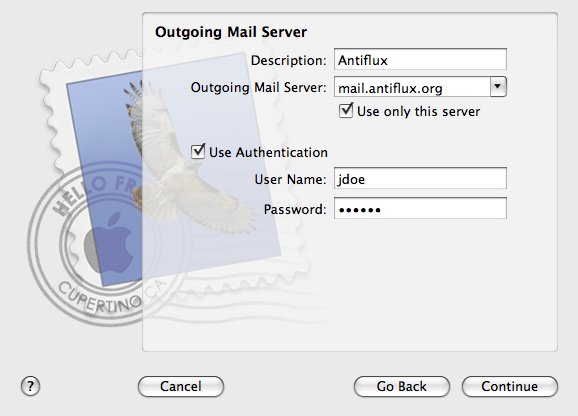
Set the outgoing mail server to mail.antiflux.org and turn on authentication.
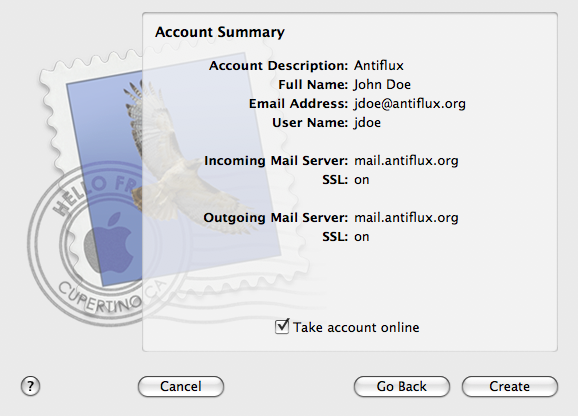
Mail.app should test the connection and, if the username and password are correct, give you something like this. Make sure SSL is on.


